|
Preface Solo Exploration: Lava, Chuar, and Carbon |
 |
|
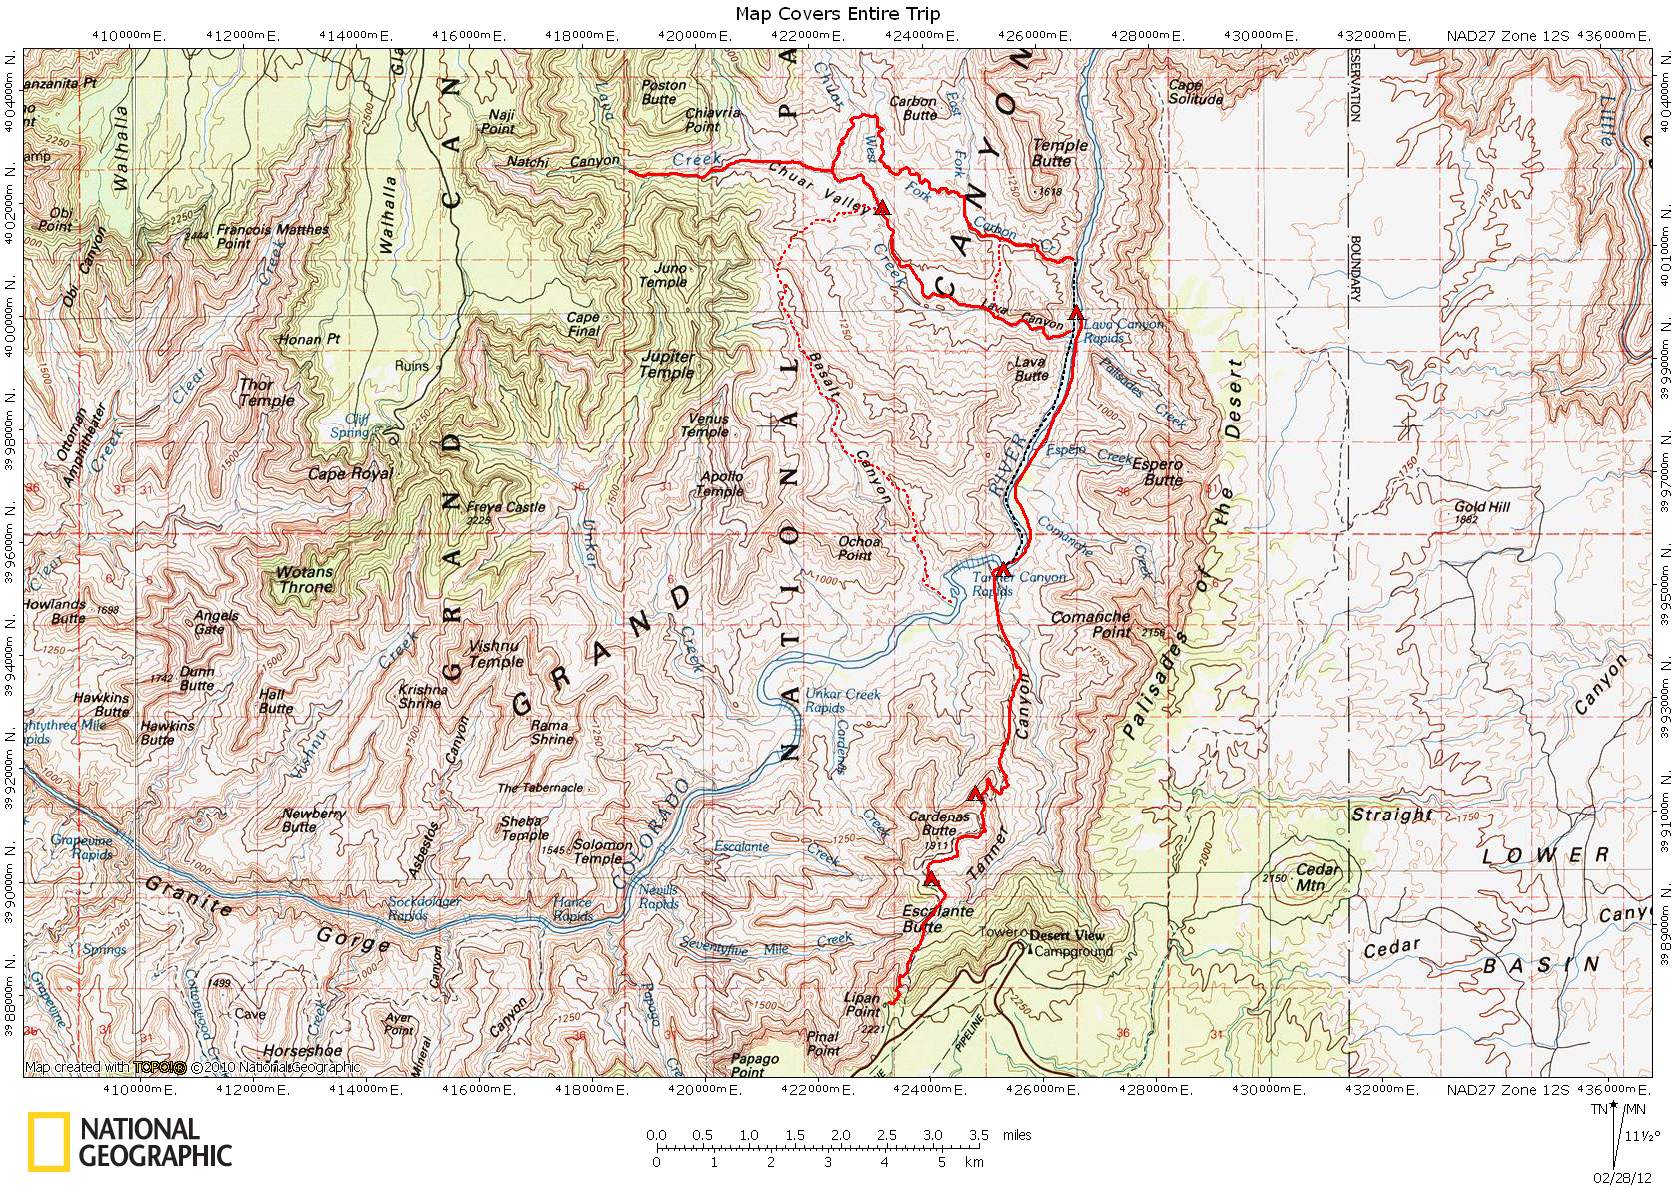
I started planning for this hike as soon as Marcey and Bert had fixed dates for our group hike in October. I wanted to do a solo hike the week before our group hike. Although this would mean a lot of time away from home, it would require only one car trip from Boulder (about 700 miles each way). There are two bridges near Phantom Ranch, the only bridges across the entire 277 river miles of Grand Canyon National Park. Actually, these are the only bridges between Navajo Bridge near Lees Ferry and the bridge at Hoover Dam -- a total of about 335 river miles. Because of this, it has started to become popular (at least among a select group of Grand Canyon backpackers) to carry a pack raft to get across the Colorado River. A pack raft opens up a lot of territory that would otherwise be difficult to access. And although pack raft weights are now only about 4 or 5 pounds, that is a lot of extra weight for me. So I thought about hitching a ride across the river by flagging down a raft trip. I chose to hike down the Tanner trail and cross the river near Lava because the Tanner trail is accessible in late October, and the Lava, Chuar, and Carbon drainages are directly across the river only a few miles NE of Tanner beach. The lower ends of these drainages are often hiked by river trips, but backpackers rarely visit this area. I would have enough time to explore farther up these drainages than most boaters ever do. And although the hiking across the river is all off-trail, overall the hike would be relatively easy. I didn't want to do anything too difficult on a solo hike. I would return via the Tanner Trail. On October 19, I headed out of Boulder and spent the night at a motel in Blanding, Utah. Early the next morning I continued on to the Canyon. NOTE: Click on photos to view a large image. |
| Back to Main Trip Index | Back to Solo Trip Index | Forward to Day 1 |